

Upgrading Zabbix 7.4.x to 8.0 LTS: A Step-by-Step Guide
Introduction
Zabbix 7.4.x no longer receives updates, and every month that you stay on it, the gap to a supported release grows. The good news: you don't need to hop through 7.4.x. Zabbix supports a direct upgrade from 7.4.x to 8.0 LTS.
The bad news: a few changes in 8.0 can quietly break an upgrade if you haven't read the notes, and a failed database upgrade without a backup is a very bad afternoon.
This guide walks through the whole process, from upgrade to verification, and includes a full rollback plan. It assumes a package-based install (Debian/Ubuntu or RHEL-family) with MySQL/MariaDB or PostgreSQL. If you compile from source, use containers or run an HA cluster, some steps will differ.
Things to Know Before You Start
The official upgrade notes for 7.4.x to 8.0 flag a few changes that catch people out:
- Server OS and packages: The database, PHP and library minimums above apply to your server, not to an intermediate version.
- Proxies: The server supports proxies no older than the previous LTS release. That is 7.4.x, so your current proxies will keep working after the server upgrade, with limited functionality, until you upgrade them.
- Backslash escaping: The warning about long history function parameters applies only when upgrading from pre-7.x versions.
- Other deployments: If you run an HA cluster, see Upgrading HA cluster. If you use TimescaleDB, see Upgrading TimescaleDB schema, and remember the manual history_json hypertable step from the 8.0 notes.
Order of operations
- Back up the database and your config files. This includes custom web server configs, because they won't be overwritten automatically.
- Meet the database and PHP minimums first. That means MySQL 8.4+, MariaDB 10.11+ or PostgreSQL 15+, and PHP 8.2+. If you're on MySQL with binary logging, set log_bin_trust_function_creators = 1. Official reference
- To upgrade the server, the recommended sequence is to stop, upgrade and start the server, then do the same for each proxy one after another. The docs say running proxies keep collecting data while the server is down, and notifications for problems during that window are generated only after the server restarts.
- Upgrade the proxies. For any SQLite proxy, remember its history is deleted on first start.
- Upgrade agents at last. This is recommended but not mandatory.
- After the upgrade, check the Host Wizard template upgrade, the moved filter tabs, and the dropped macros in your actions and media types.
- Also confirm that your OS and database versions are supported by 8.0. A database that's too old will stop the server from starting.
For more information: Click Here
Upgrading Zabbix to 8.0 LTS: A Step-by-Step Guide
Step 1: Plan the Order
Upgrade in the below order:
- Upgrade order: Server first, then proxies, then agents.
- Agents: Upgrading is recommended but not mandatory.
- OS compatibility: If your OS isn't supported by the 8.0 packages, upgrade the OS first.
Step 2: Back Up Everything
This is the most important step. If the upgrade fails halfway, the backup is your only way back.
MySQL/MariaDB:
mysqldump --single-transaction --routines --triggers -u root -pzabbix | gzip > /backup/zabbix_db_$(date +%F).sql.gz
PostgreSQL:
sudo -u postgres pg_dump -Fc zabbix > /backup/zabbix_db_$(date +%F).dump
Config and frontend files:
tar czf /backup/zabbix_files_$(date +%F).tar.gz \/etc/zabbix /usr/share/zabbix /usr/lib/zabbix/usr/sbin/zabbix_server 2>/dev/null
Running on a VM? Take a snapshot too. And keep plenty of free disk space handy, because the database upgrade can eat a lot of it on bigger installs.
If you're on MySQL with binary logging turned on, run this before you start (you can switch it back afterwards):
SET GLOBAL log_bin_trust_function_creators = 1;
Step 3: Check Prerequisites
mysql --version # or: psql --versionphp -v
Fix anything that's too old before touching Zabbix, and make sure your web server or php-fpm is using the right PHP version.
Step 4: Stop Zabbix Services
systemctl stop zabbix-server zabbix-agent2 # or zabbix-agent
On RHEL-family systems, also stop zabbix-web-service if you use it.
Step 5: Switch to the 8.0 Repository
Get the release package for your OS from the Zabbix download page (choose 8.0 LTS). Use the exact URL for your OS and version.
Debian/Ubuntu: Reference
wgethttps://repo.zabbix.com/zabbix/8.0/ubuntu/pool/main/z/zabbix-release/zabbix-release_latest_8.0+ubuntu24.04_all.debdpkg -i zabbix-release_latest_8.0+ubuntu24.04_all.debapt update
RHEL / Alma / Rocky: Reference
rpm -Uvhhttps://repo.zabbix.com/zabbix/8.0/rhel/10/x86_64/zabbix-release-latest-8.0.el10.noarch.rpmdnf clean all
If you use Extra Packages for Enterprise Linux (EPEL) on RHEL-family systems, make sure it isn't also offering Zabbix packages that conflict.
Step 6: Upgrade the Packages
Debian/Ubuntu:
apt install --only-upgrade zabbix-server-mysql zabbix-frontend-phpzabbix-apache-conf zabbix-sql-scripts zabbix-agent2
RHEL-family:
dnf upgrade zabbix-server-mysql zabbix-web-mysql zabbix-apache-confzabbix-sql-scripts zabbix-agent2
Swap mysql for pgsql, and apache for nginx, to match your setup. When asked about config files, keep your existing ones, then compare them against the new defaults afterward.
Step 7: Review Config Changes
Compare your /etc/zabbix/zabbix_server.conf against the new default (.rpmnew or .dpkg-dist), check for changed or deprecated parameters, and confirm your database credentials are still correct.
Step 8: Start the Server and Watch the Database Upgrade
Open a second terminal on the log:
tail -f /var/log/zabbix/zabbix_server.log
Then start the server:
systemctl start zabbix-server
On startup, Zabbix compares the current and required database versions and runs the upgrade patches automatically, logging progress as a percentage. When you see "database upgrade fully completed", you're done. Don't interrupt it. On a large database this can take a while.
Common Failures During the Database Upgrade
- "You do not have the SUPER privilege and binary logging is enabled ": set log_bin_trust_function_creators = 1 and restart the server.
- Permission errors: the database user needs CREATE, DROP, ALTER and INDEX rights.
- Out of disk space: free up space, and restore from backup if the database was left in a bad state.
Step 9: Upgrade the Frontend
# Ubuntu/Debian:sudo systemctl restart apache2 php-fpm# RHEL:sudo systemctl restart httpd php-fpm
Open the web UI. If it looks broken, clear your browser cache and cookies.
Step 10: Upgrade Proxies and Agents
For each proxy, stop it, install the 8.0 repo and packages, and start it again. It upgrades its own database automatically, and an SQLite proxy will lose its stored data at this point. Then do the agents (optional but recommended):
systemctl stop zabbix-agent2# install the 8.0 repo and upgrade the packagesystemctl start zabbix-agent2
Step 11: Verify the Upgrade
- Check the server log for errors after the upgrade message.
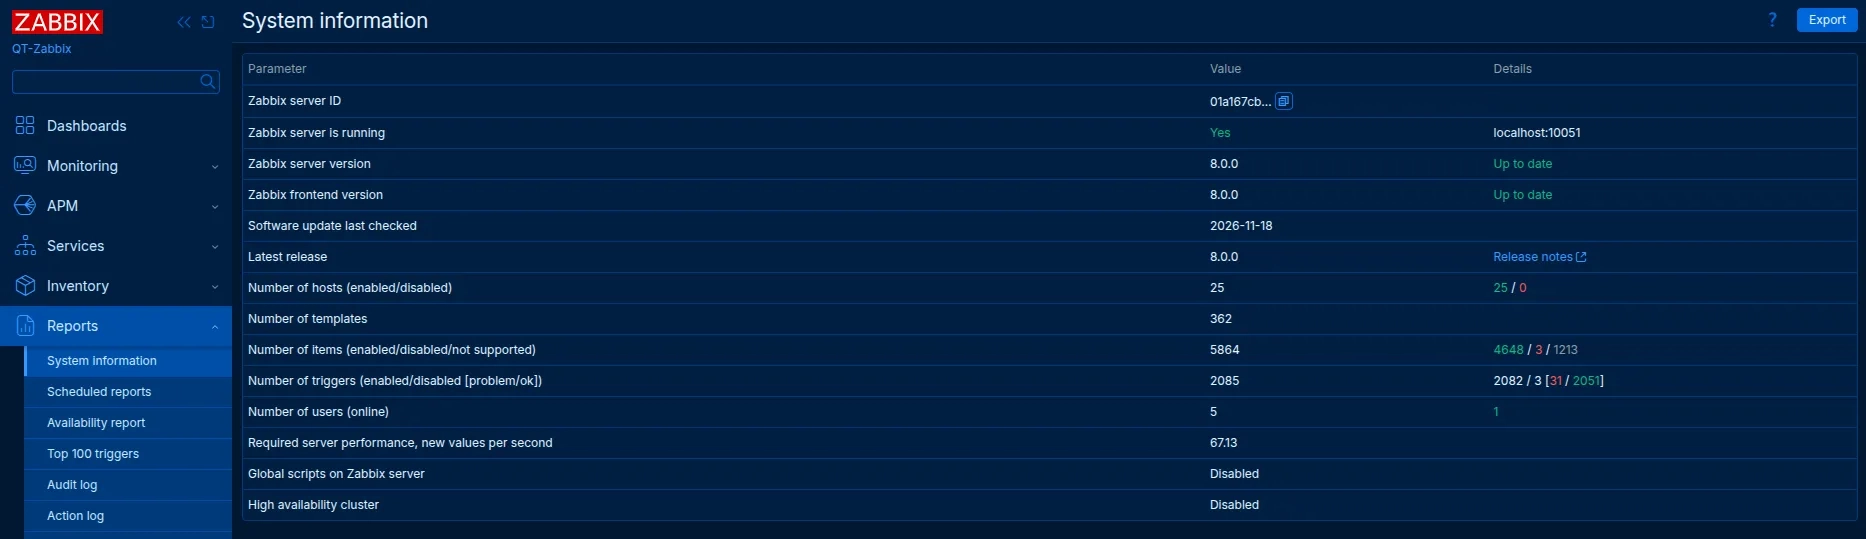
- Go to Reports > System information and confirm the version shows 8.0.x.
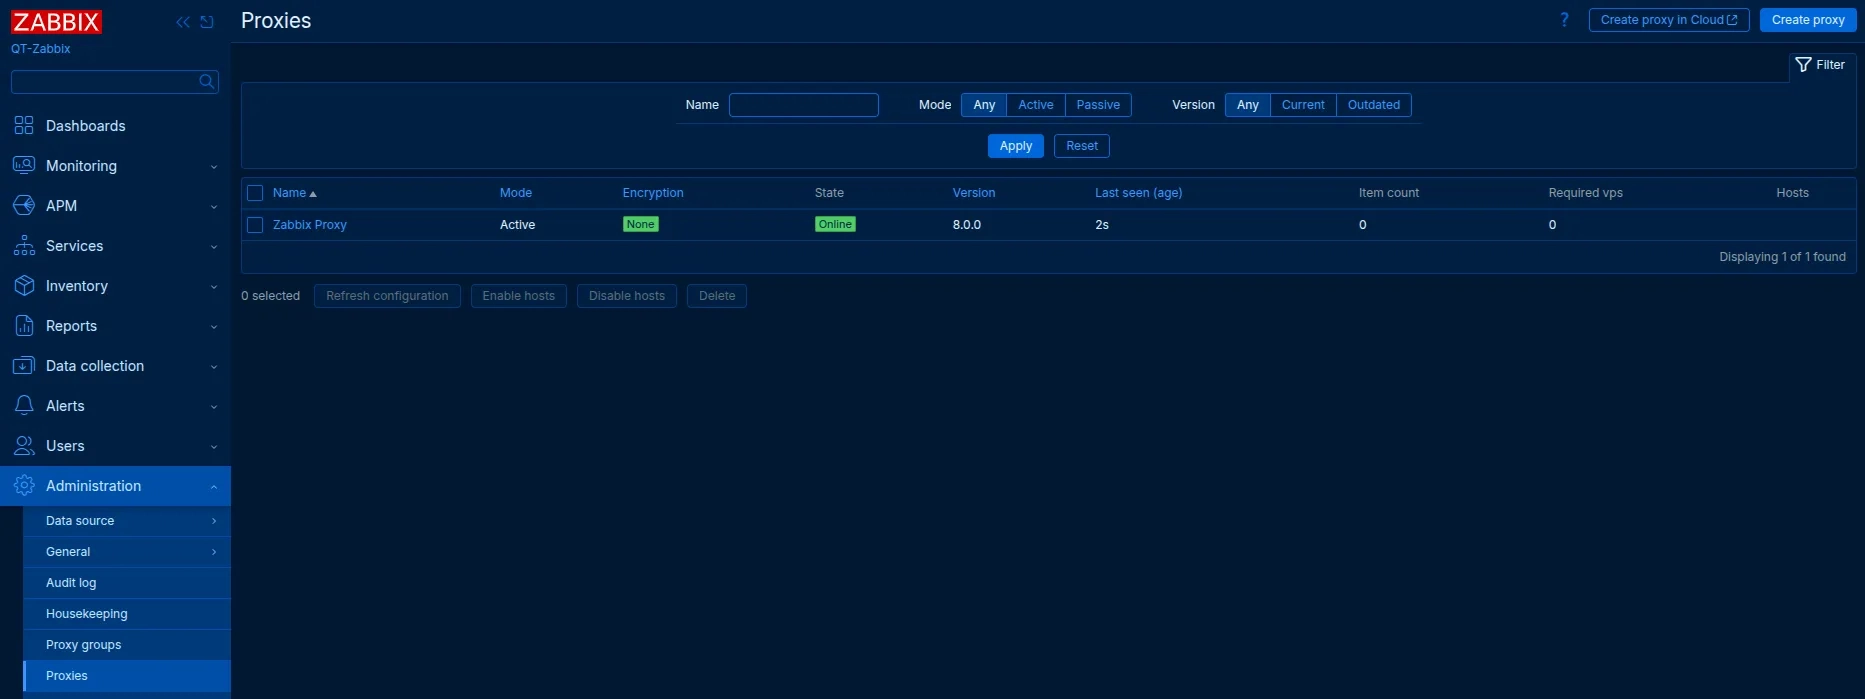
- Check that hosts are available, data is flowing under Monitoring > Latest data, and proxies show a recent "last seen."
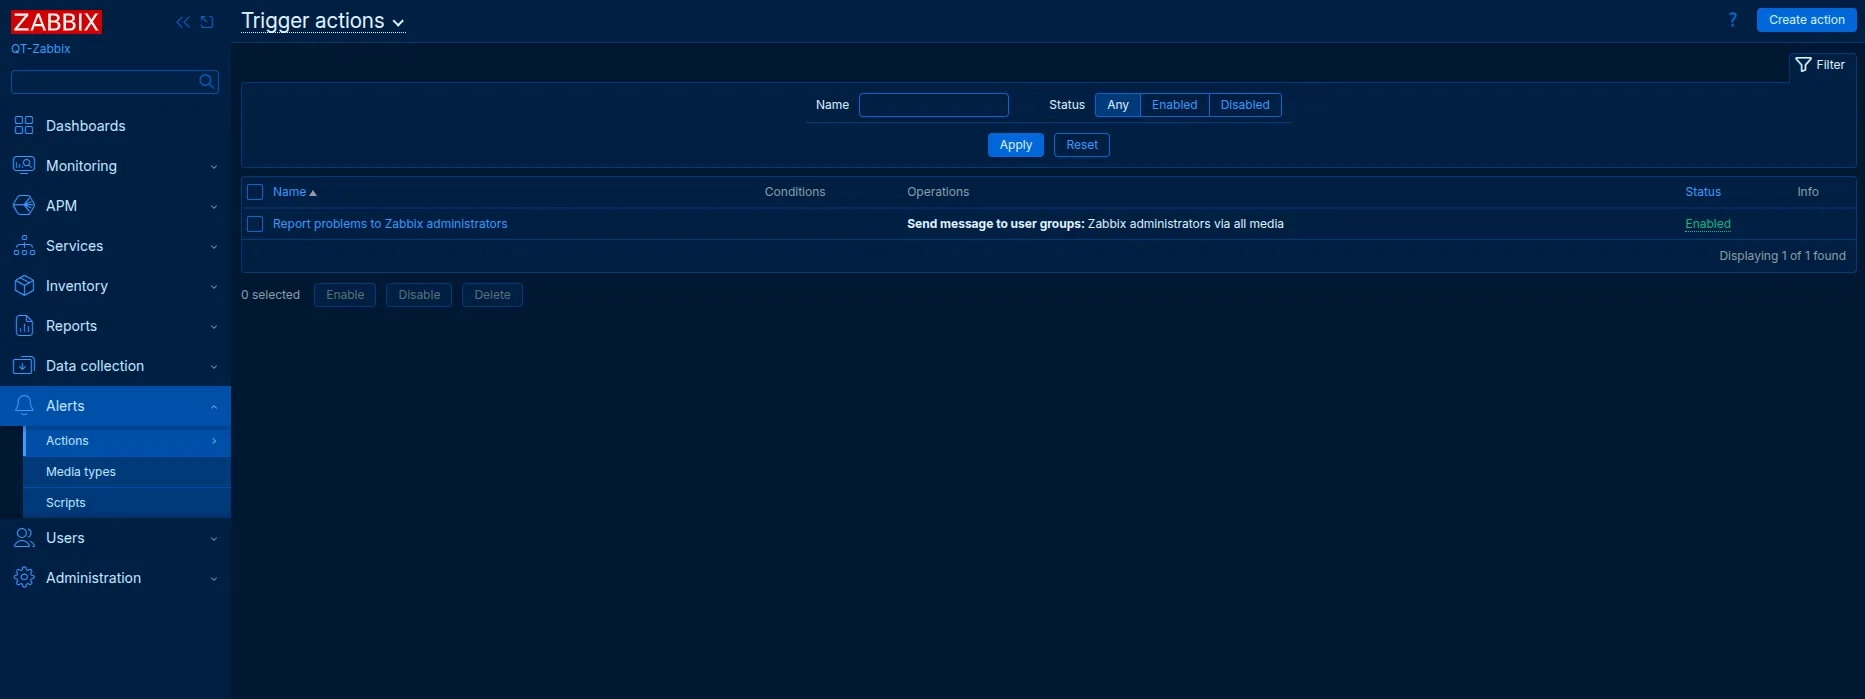
- Test your alert media types and a notification action.
- Check third-party integrations, as some may not yet be compatible with 8.0.
Conclusion: Upgrade with Confidence, Not Crossed Fingers
Once you're on 8.0 LTS, you get a supported release, long-term stability, and access to everything the new version offers. To see what's new in Zabbix 8.0, you can refer to our blog: Zabbix 8.0: Advancing Infrastructure Monitoring and Observability.
Running a large database, multiple proxies, or a mission-critical setup? You don't have to do it alone. Qavi Tech can help you plan, test, and execute your Zabbix upgrade with minimal downtime and a tested rollback path from day one.
Ready to upgrade? Contact Qavi Tech and let's make your monitoring future-proof.

More Blogs
Discover the latest insights and trends in technology with the Qavi Tech Blog. Stay updated with expert articles, industry news, and innovative ideas.


Planning an Elastic Deployment? Get the Official Checklist (Free PDF)
Reduce risks, improve performance, accelerate go-live.